Kontaktai ir paslaugos
Katalogas
Apšvietimo priedai
Atsinaujinančioji energija
Automatika ir valdymas
Kabeliai ir laidai
Led Apšvietimas
Lemputės
Rozetės ir jungikliai
Ventiliatoriai, siurbliai ir vartų pavaros
Rodyti viską
Aušinimo sistemos
Durų ir vartų furnitūra
Filtrai ir (arba) separatoriai
Katilai ir šildytuvai
Oro drėkintuvas
Oro valymas
Oro įsiurbimo ir (arba) ištraukimo įrenginiai
Platintojai
Pramoniniai ventiliatoriai
Priedai (ventiliatoriai, siurbliai ir vartų pavaros)
Ventiliatorius
Vėdinimo ir oro kondicionavimo sistemos
Šildymo kabeliai ir elektrinis paviršiaus šildymas
Šildymo prietaisai
Įrengimas
Rodyti viską
E-mobility
Kabelių guolių sistemos
Kabelių jungtys
Montavimo vamzdžiai
Signalizacijos ir apsaugos sistemos
Tvirtinimo elementai
Įrankiai, matavimo prietaisai ir apsauga
Apšvietimo apsauga
Duomenys ir telekomunikacijos
Elektros skydai
Kabelio įvadas
Maitinimo elementai ir įtaisai, reaktyviosios galios kompensavimas
Montavimo medžiagos
Paskirstymo dezute
Pramoninės jungtys ir blokai
Šviestuvai
Rodyti viską
Avariniai šviestuvai ir priedai
Gatvių ir parkų šviestuvai
LED juostos, moduliai, profiliai ir priedai
LED panelės ir priedai
Linijiniai ir moduliniai šviestuvai
Pramoniniai šviestuvai
Sprogimui atsparūs šviestuvai
Šviesos bėgių žibintai ir priedai
Žibintuvėliai, baterijos ir priedai
Apatiniai šviestuvai
Grindų šviestuvai
Lubose montuojami šviestuvai
Mašinų ir darbo stalų šviestuvai
Pakabinamos lempos
Paviršinio montavimo lempos
Sieniniai šviestuvai
Stalo lempos
Į žemę montuojami šviestuvai
Įmontuotos montavimo lempos
Šventinis apšvietimas
Mano paskyra
Užsiregistruokite ar prisijunkite norėdami atrakinti savo išskirtines B2B kainas ir pradėti apsipirkinėti
Prisijung
Neturite paskyros?
Sukurti paskyrą
Registruokitės, kad atrakintumėte savo išskirtines B2B kainas ir pradėtumėte apsipirkinėti. Užsiregistruokite dabar!
- Pradžia /
- Rozetės ir jungikliai /
- Jungiklių ir kištukinių lizdų valdymo įtaisai /
- Isolating relay with window contact, 1 NO contact 10A
- Pradžia /
- ELTAKO +
- Rozetės ir jungikliai /
- ELTAKO Rozetės ir jungikliai +
- Jungiklių ir kištukinių lizdų valdymo įtaisai /
- Isolating relay with window contact, 1 NO contact 10A

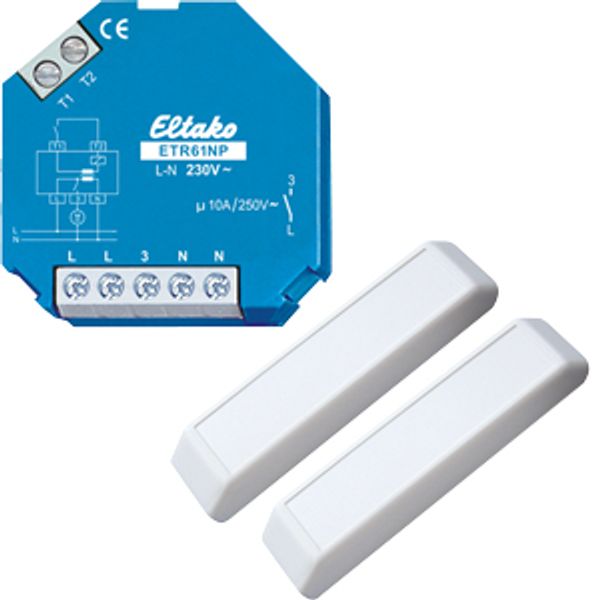
Isolating relay with window contact, 1 NO contact 10A
Yra sandėlyje: Ne
Pardavėjo atsargos: Ne
Minimalus užsakymo kiekis: 1
Kaina (be PVM):
48,46 €
EAN: 4010312205495
MPN: 61100631
Pakuotė: 1
Technical Information
| Prekės būklė | Nauja |
| Gamintojo pavadinimas | Isolating relay with window contact, 1 NO contact 10A |
| Prekės ženklas | ELTAKO |
| Kategorijos |
Jungiklių ir kištukinių lizdų valdymo įtaisai
|
| Kilmės šalis | CN |
| Suderintos sistemos kodas | 8536 4900 00 |
| Nominali įtampa | 230 V |
| Montavimo metodas | Kita |
| Dažnio diapazonas | 50 Hz |
| Prijungiamų variklių skaičius | 1 |
| Pastotės įvestis | No |
| Centrinė įvestis | Yes |
Pakavimo informacija
| Pakavimo lygis 1 | 4010312205495, 4010312205495 |
| Pakavimo lygis 2 | 4010312205495 |
| Pakavimo lygis 3 | 4010312205495 |
Atsisiuntimai
Aprašymas
1 NO contact not potential free 10A/250V AC. 230V LED lamps up to 100W, incandescent lamp load 2000W. With window contact. Standby loss 0.5 watt only. For installation. 45mm long, 45mm wide, 18mm deep. State-of-the-art hybrid technology combines advantages of nonwearing electronic control with high capacity of special relays. Control input with internally produced low voltage 24V DC. With an isolating transformer electrically isolated from power supply and make contact (PELV). Therefore no external low voltage power supply necessary. With 2 L terminals and 2 N terminals for an easy and quick installation. Power supply 230V. The enclosed window contact consists of a Reed relay with terminals and a solenoid. The NC contact opens when the solenoid approaches closer than 25mm. The disconnection relay ETR61NP is connected to terminals T1 and T2. Power supply to the extractor only cuts in when the window is open. ETR61NP can be wired in the flush mounted socket behind the socket for the extractor. Mounting the window contact FK: Lever out the inserts at the narrow end of the housing. Wire up the Reed relay and cut out the cable entry on the housing. Affix the two housings in parallel maximum 15mm apart and also screw if necessary. In the longitudinal direction the solenoid may be twisted in any direction compared to the Reed relay.
